In this digital world, streaming services like Spotify are popular among youngsters now. Apart from listening, tracking your musical journey is interesting because it is entertaining. Receiptify will help you track the musical journey. Using Receiptify Herokuapp is as easy as slipping on a pair of comfy shoes. This handy tool allows you to effortlessly organize your music listening habits in one convenient place. In this article, we will explore the importance of Receiptify Herokuapp, How to Use Receiptify Herokuapp and more.
Contents
- 1 About Receiptify Herokuapp:
- 2 How to Use Receiptify Step By Step Guide?
- 3 How to Share Receiptify on Social Media?
- 3.1 Is it Safe to Use Receiptify?
- 3.2 Can I Use Receiptify Herokuapp Without an Internet Connection?
- 3.3 Is There a Limit to the Number of Receipts I Can Upload to Receiptify Herokuapp?
- 3.4 Can I Customize the Appearance of My Receipts in Receiptify Herokuapp?
- 3.5 Is There a Mobile App Available for Receiptify Herokuapp?
- 3.6 Related
About Receiptify Herokuapp:
Receiptify is an online tool that generates a “receipt” based on your Spotify listening history. This receipt is essentially a list of songs and artists, formatted to resemble a shopping receipt, showing your most played tracks over a certain period. It lists songs and artists much like items on a store receipt, complete with timestamps and a total play count at the bottom.
Michelle Liu, a web developer and designer create the Receiptify Herokuapp. Her background in development and design played a crucial role in creating this unique application. Receiptify apps get more popular once users share their Receiptify images on social media platforms. Platforms like Twitter, Instagram, and Facebook played a significant role in popularizing Receiptify.
How to Use Receiptify Step By Step Guide?
Using Receiptify is quite straightforward. It’s a user-friendly tool that connects with your Spotify account to generate a visual “receipt” of your listening history. Here’s a step-by-step guide on how to use Receiptify:
- First, visit the Receiptify Herokuapp website in your web browser.
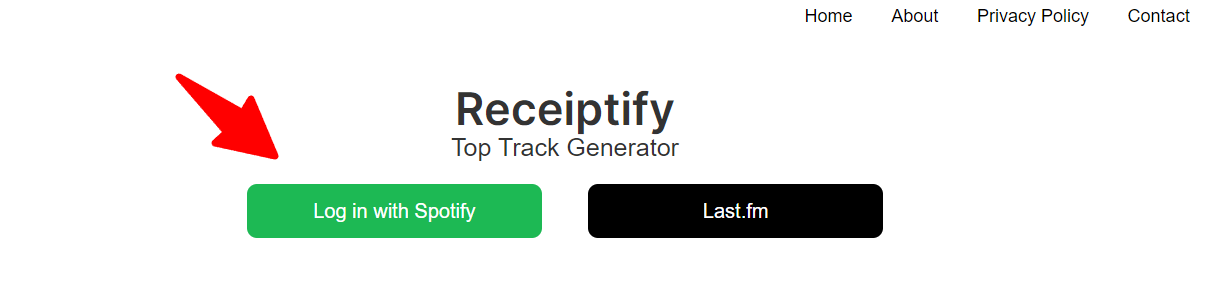
- Once on the Receiptify page, you will see an option to log in with your Spotify account. Click on this to proceed.
- You will be redirected to a Spotify login page. Enter your Spotify credentials to log in.

- After logging in, Spotify will ask you to authorize Receiptify to access your Spotify data.
- This permission is necessary for Receiptify to analyze your listening history and generate your music receipt.
- Once granted access, you can choose the time frame for which you want to generate a receipt.
- Typically, Receiptify allows you to select from several options, such as ‘Last Month’, ‘Last Six Months’, or ‘All Time’. Choose the time frame that interests you the most.
- After selecting the time frame, click the button to generate your receipt.
- Receiptify will then process your Spotify listening data and create a receipt listing your most played songs for the chosen period.
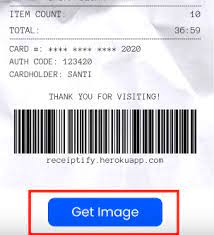
- Your music receipt will be displayed on the screen. It will look like a traditional shopping receipt with your top tracks listed as items.
- You can download or take a screenshot of this receipt to share on social media or with friends.
Sharing your Receiptify receipt on social media is a great way to engage with friends and followers over your music tastes. Here’s a guide on how to do it:
- First, follow the steps to create your Receiptify receipt by logging into your Spotify account through the Receiptify app and choosing your desired time frame.
- Once your receipt is generated, you can download it directly from the Receiptify website. If not, you can take a screenshot of the receipt.
- Open your preferred social media app or website, like Facebook, Twitter, Instagram, or LinkedIn.
- Attach the Receiptify receipt image. Write something engaging to accompany your receipt image.
- You can also use relevant hashtags to increase the visibility of your post.
- Consider your privacy settings before sharing, especially if your receipt includes personal information or you prefer to keep your music tastes private.
- Hit the share or post button once you’re happy with your post.
- Engage with any comments or interactions from your followers. It can be a great conversation starter.
Is it Safe to Use Receiptify?
When using Receiptify Herokuapp, you may wonder if it’s safe. It’s natural to have concerns about the security of your personal information and the potential risks involved in using an online service. However, you can rest assured that Receiptify Herokuapp prioritizes the safety of its users.
Receiptify Herokuapp takes several measures to ensure the security of your data. Firstly, it uses encryption to protect your information during transmission. It means that any data you enter into the app is scrambled and can only be read by authorized parties. Furthermore, Receiptify Herokuapp doesn’t store any of your personal information after the generation of your receipt. It reduces the risk of your data being compromised in a security breach.
FAQ’s:
Is There a Limit to the Number of Receipts I Can Upload to Receiptify Herokuapp?
There is no limit to the number of receipts you can upload to Receiptify Herokuapp.
Can I Customize the Appearance of My Receipts in Receiptify Herokuapp?
Yes, you can customize the appearance of your receipts in Receiptify Herokuapp.
Is There a Mobile App Available for Receiptify Herokuapp?
No, there is no mobile app available for Receiptify Herokuapp.
Related searches:
- How to use receiptify herokuapp android
- How to use receiptify herokuapp reddit
- how to make receiptify
- receiptify spotify login
- receiptify apple music login
- receiptify apple music not working
- apple music receiptify
Conclusion:
In conclusion, Receiptify Herokuapp is a user-friendly platform that allows you to generate receipts like the format of your musical listening. Following the simple steps outlined in the article, you can easily use Receiptify and share the Spotify receipts on social media. Additionally, it’s safe to use, ensuring the security of your information. Start using Receiptify today tra, take your musical experience, and share it with your friends for fun.