How to Find Receiptify: In an era where music streaming has become the backbone of our daily soundtracks, we interact with and share our musical journeys have evolved. Receiptify is a unique application that transforms your music listening history into a visually appealing receipt format. Whether you’re a Spotify enthusiast, an Apple Music fan, or a Last.fm user, Receiptify caters to a diverse audience, turning your streaming data into a personalized music receipt. But how do you find Receiptify, and how do you use it? This guide will help you how to find Receiptify and make the most out of Receiptify.
Contents
Understanding the Concept of Receiptify:
What exactly is Receiptify? It’s a unique tool that creates a Spotify playlist styled like a shopping receipt based on your listening history. You can generate your ‘receipt’ based on your top tracks in the last month, six months, or of all time. It’s a clever way to visualize your music tastes and habits. You might wonder, ‘Why would I want a music receipt?’ Well, it’s not just about the novelty. It’s also a unique way to share your music preferences with your friends, especially if you’re a constant discoverer of new music. With Receiptify, you’ve got an instant snapshot of your top tracks to show off.
Just to let you know, Receiptify isn’t a standard Spotify feature. A third-party developer created it, but it’s a safe and fun way to enhance your Spotify experience.
Also, Check: Receiptify Amazon Music
How to Find Receiptify?
Receiptify, a unique tool, allows you to turn your top tracks into a stylish receipt format. But where and how to find Receiptify? Firstly, Receiptify isn’t a built-in Spotify feature but a third-party creation. You won’t find it directly in your Spotify app. Instead, you’ll have to go online and visit the Receiptify website. Here’s a simple three-step guide on how to find Receiptify and how to use it:
- First, use a web browser to go to the Receiptify website. You can do this on your computer or mobile device.
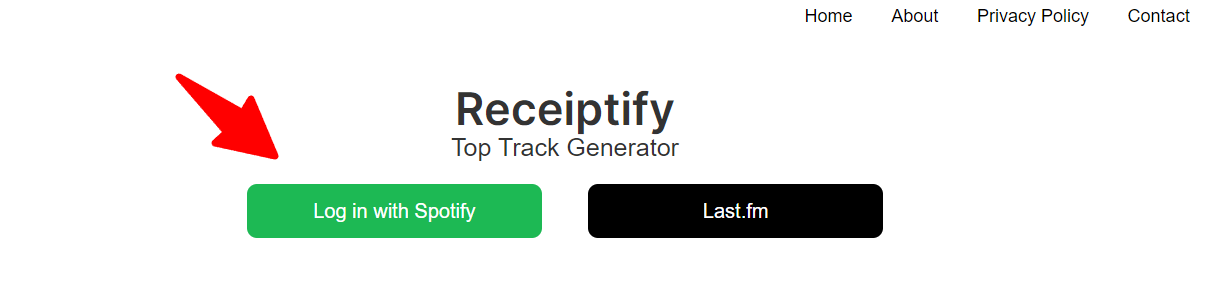
- Now, you will see the option “Login with Spotify” and Last.fm
- Select the ‘Login with Spotify’ option. It will open the Spotify login page.
- Give the login credentials and access to Receiptify to analyze your Spotify data.
- After connecting, Receiptify will automatically generate your top tracks in a receipt format.
How to Use Receiptify to Generate the Receipt?
Now that you’re on the Receiptify homepage, initiating the login process is your next step. Don’t worry; it’s straightforward and won’t take much of your time. Here’s a quick guide to get you started.
- Locate the Login Button – Look for the ‘Login’ button, usually found in the top-right corner of the webpage. It’s typically designed to stand out and should be easy to spot.
- Enter your Credentials – Once you’ve clicked on the ‘Login’ button, a prompt will appear for you to enter your username and password. Ensure you input these details correctly. If you forget your password, there’s usually a ‘Forgot Password’ option to help you recover it.
- Hit the Login Button – After entering your credentials, click the ‘Login’ button to access your account. You’ll be redirected to your Receiptify dashboard if your login details are correct.
Also Check: Spotify Monthly Receipt
How to Download Receiptify Spotify Receipt?
Downloading a Spotify receipt from Receiptify involves a straightforward process that turns your Spotify listening data into a stylish, receipt-like format. This unique visualization of your music listening habits can highlight your most-played tracks over various periods, such as the last month, six months, or year. Here’s how to get started with creating and downloading your Spotify receipt from Receiptify:
- Visit the Receiptify Website: Open your browser and navigate to the official Receiptify website.
- Connect Your Spotify Account: Once on the Receiptify website, you’ll see the option to connect your Spotify account. Click on this to proceed. You’ll be redirected to Spotify’s login page for authorization.
- Login with Spotify: Log in to your Spotify account and grant the necessary permissions for Receiptify to access your listening history.
- Select Your Period: After connecting your account, you can choose the time frame for your receipt. Receiptify typically offers choices like the past month, the past six months, or the entire past year.
- Generate Your Receipt: With your account connected and the period selected, click on the button to generate your receipt.
- Download Your Receipt: Once your Spotify receipt is generated, you’ll see an option to download it. Click on the receipt image and select “Save image as” from the context menu. Choose a destination on your computer or device to save the picture, and your Receiptify Spotify receipt will be downloaded.
- Share Your Receipt: Many users enjoy sharing their Receiptify receipts on social media or with friends to compare musical tastes or showcase their listening habits.
How to Check Receiptify Results?
Checking your Receiptify results is straightforward; log into your account and head to the ‘Results’ section. Here are three key things to fit in your Receiptify results:
- Transaction Dates: Make sure the dates on your receipts match the dates of your purchases. If they don’t, there may be an error that needs correction.
- Item Details: Check the details of each item for accuracy. It includes the price, description, and quantity.
- Total Amount: The total amount should be the sum of all the items listed. If it’s not, contact Receiptify customer support immediately.
If you carefully check these three things, you’ll ensure your Receiptify results are accurate and reliable. It’s the best way to ensure you get the most out of Receiptify.
Is Receiptify made by Spotify?
While you’re ensuring the accuracy of your Receiptify results, you might start wondering about the origins of this handy tool – does Spotify make it? The short answer is no, Receiptify isn’t a product of Spotify. It’s an independent tool developed by a third-party developer, not affiliated with the music streaming giant. However, it’s worth noting that Receiptify does integrate with Spotify’s API to generate your music listening receipt.
FAQ’s:
1. Is There a Mobile Application for Receiptify?
Ans: No, Receiptify doesn’t have a mobile app. It is an online web tool.
2. Can I Use Receiptify Without a Spotify Account?
Ans: No, you can’t use Receiptify without a Spotify account.
3. Is There a Limit to How Many Receipts I Can Generate Using Receiptify?
Ans: There needs to be a cap on the number of receipts you can generate. You’re free to create as many as you want.
4. Are There Any Fees Associated With Using Receiptify?
Ans: You’re in luck! There aren’t any fees associated with using Receiptify. It’s a free service.
5. Does Receiptify Support Other Music Streaming Platforms Aside From Spotify?
Ans: No. Receiptify only supports the Spotify streaming service.
Conclusion:
In Conclusion, you now know how to find Receiptify and use it. Whether enjoying its web tool or downloading a Spotify receipt, it’s a fun and easy way to track your most played tracks. Although Spotify does not make it, it’s a great companion to the platform. Now you’re ready to check out your Receiptify results and share your listening habits with your friends. Happy listening!